Inside Story: How I Photograph the Birds of My Backyard from the Comfort of Home
Most of the time warblers grab a seed and take off, but for this once-in-a-lifetime shot it was bird-follows-fly time. I was at the camera, determined to get this yellow-rumped variety in flight. I barely registered the fly and didn’t think there was any chance I’d get it. When I did, I realized my successful backyard efforts were really aimed at creating an environment in which this picture could happen. Was the warbler successful? No idea. Z 9, NIKKOR Z 400mm f/2.8 TC VR S, 1/4000 second, f/4, ISO 1600, aperture-priority exposure.
I love to photograph birds, and I have the advantage of living in a wooded area of central Florida that offers lots of local varieties along with travelers (read: migratory birds) who come and go as the seasons change. I didn’t mind going out in the backyard or into the adjoining woods, or making visits to Orlando Wetlands, but Florida weather was sometimes too hot for location or home-area photography. Besides, my presence in the backyard or the woods often kept the birds away or scared them off.
But I had another advantage, one that made all the difference: my home-office window offered a perfect view into the backyard and the woods beyond. I realized that with some creative thinking and do-it-yourself construction work, I could have an all-the-comforts-of-home bird blind.
Here’s how I did it.
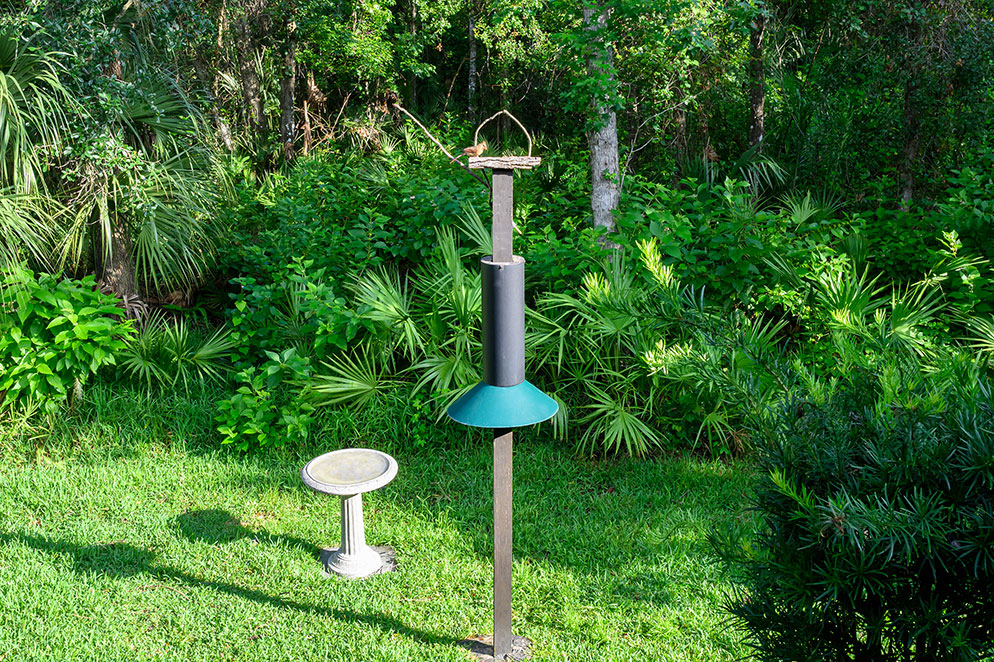
One of the birdbaths, the feeder and its double baffle system—green cone to defeat squirrels, slippery gray tube to foil raccoons. The strip of tree bark glued to the feeder’s woods-facing edge is one of several bird-friendly elements. Every few months I pop it off and put on a new one. The arch is a bent branch the birds really like. I get a lot of good shots when they land on it, then drop down to the tray.
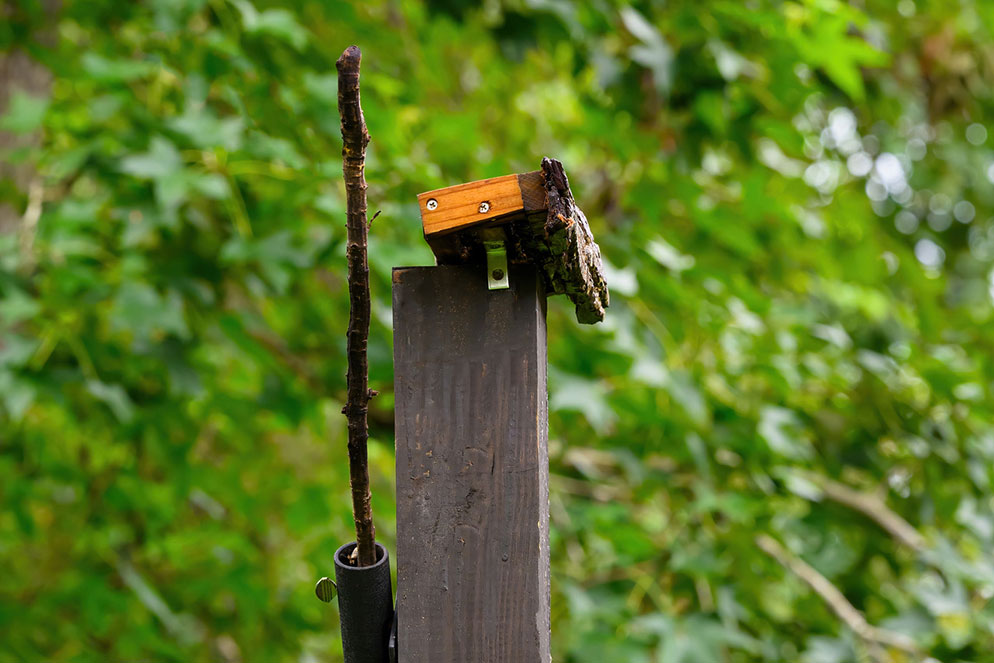
A back view of the feeder platform with a morning’s worth of seeds and dried mealworms. I modified the rectangular feeder, which was purchased at a home store, by cutting its width in half. Narrow allows me to control depth of field while giving birds adequate space to land, but not so much that might affect depth of field.
Side view of the feeder showing the pipe-tube branch holder. The branches get changed frequently to keep birds curious and interested.
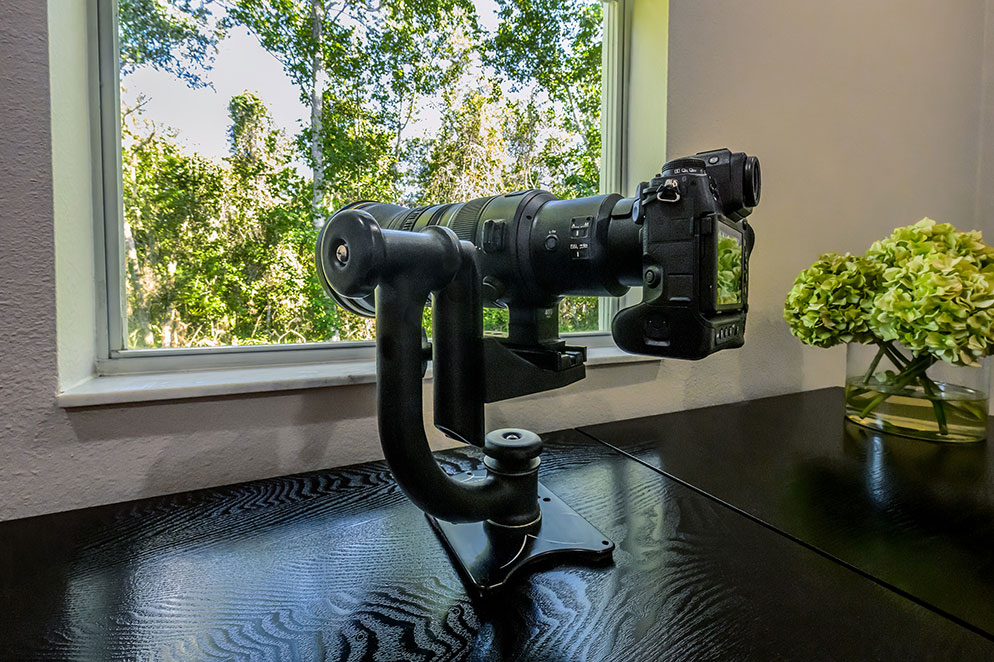
The weight of the camera rig at the office window keeps everything pretty much rock solid on the Platypod. The Wimberly gimbal allows for smooth horizontal and vertical adjustments of the Z 9 and the NIKKOR Z 400mm f/2.8 TC VR S lens.
Destination: Deb’s Place
The first consideration was attracting the birds to the right spot in the yard. That meant providing a safe, inviting and familiarly friendly place. I’d have a feeder, of course, and a few birdbaths, and I’d frequently switch out branch perches to attract the birds’ attention—and keep viewers of my bird pictures from seeing the same thing in each photo. I’d set the perches above the feeder so I’d be able to capture drop-down moments as the birds went for the seeds. I’d also fit the feeder’s post with two baffles—one to deter squirrels, the other, raccoons.
The feeding setup would have to line up with the office window so that my camera’s telephoto view would give me a variety of framing and composition choices. A gimbal mount would allow me to swivel the camera, but the alignment of the office table and the feeder setup would be fixed, so I carefully worked out what the table and feeder heights had to be. Those were crucial decisions because it was important to me to be at eye-level with the birds when I viewed them through the lens. It was critical to get this exactly right because the front of the lens would be only 18 feet from the feeder.
I’d seen this courtship-like feeding between these cardinals, so I set up a distinctive and fittingly romantic setting by searching out a tendril-wrapped vine in the woods. Then it was just a matter of listening for their equally distinctive voices. Auto Capture was on, but I was at the camera the moment I heard them and took the picture after swiveling the camera a bit to center them in the frame. Z 9, NIKKOR Z 400mm f/2.8 TC VR S, 1/2500 second, f/6.3, ISO 4000, aperture-priority exposure.
RSVP
Fortunately, I not only love to photograph birds, I love to learn about them, and that was key to attracting—actually, inviting—them to the backyard. I used bird guides and the internet to familiarize myself with my area’s birds and the sounds of their voices. Next came learning about migrating birds and their seasonal schedules. Then I wanted to know what types of food the locals and the likely visitors preferred.
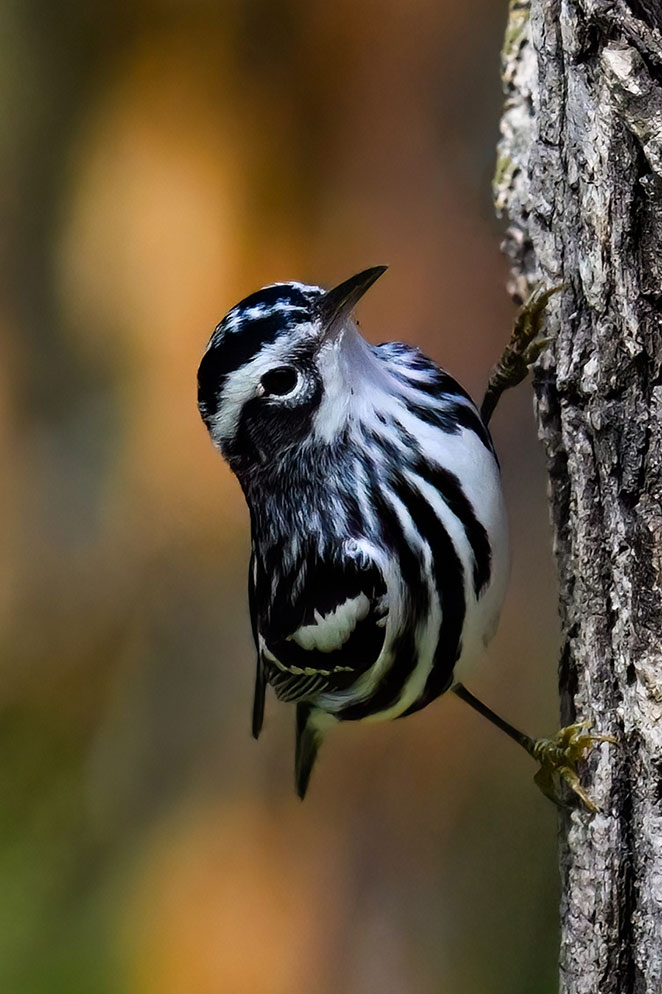
This black and white warbler’s voice got my attention, but it never came to the feeder, so I switched on the 400mm’s built-in 1.4x teleconverter and tracked him, swiveling the camera as he flew around, landing and taking off from a tree at the edge of the woods. Z 9, NIKKOR Z 400mm f/2.8 TC VR S, 1/4000 second, f/8, ISO 4000, aperture-priority exposure.
The final decision was all about feeding time. I decided to put out relatively small amounts of food in mid-morning, and make a little show of it, figuring the birds would pick up on the pattern. I figured correctly—pretty soon the sound of the screen door slamming told the birds it was almost time for breakfast at Deb’s place.
And it all worked. The birds come, and sometimes they bring their babies, and I get to see the whole cycle of bird life and the different behaviors among different birds. I learned what birds allow what other birds to feed at the same time. I learned that there’s a dynamic of bird activity that’s fascinating as well as photogenic.
I like this one for the repetitive arches of the branch and the wing of the Carolina wren, and for the way the perch stands out against the background. This perch was especially popular—the birds were curious and went in, out and around the arch. Wrens are particularly inquisitive and will explore everything, and that makes for lots of image opportunities. Z 9, NIKKOR Z 400mm f/2.8 TC VR S, 1/12,800 second, f/4, ISO 1600, aperture-priority exposure.
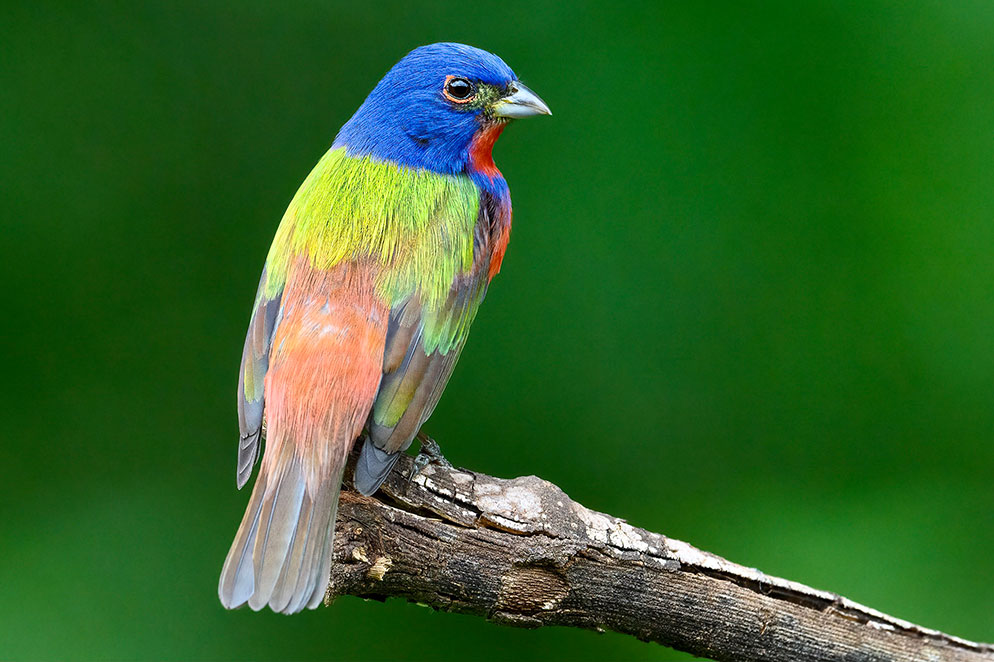
This painted bunting obliged my wishes for composition by perching at the very edge of a newly-placed branch. It never made a sound—I just saw a flash of color and realized it was a bird everyone wants to photograph. They tend to move fast and are silent because their color makes them highly visible to predators. This was taken prior to Auto Capture, so as soon as I saw the color flash I stayed at the camera until I got the shot. Z 7II, Mount Adapter FTZ II, AF-S NIKKOR 500mm f/5.6E PF ED VR, 1/640 second, f/8, ISO 3200, manual exposure.
Imaging Means and Methods
At the start of my indoor bird blind backyard photography, my go-to camera was the Z 7II. I switched to the Z 9 when it was introduced. I tried a variety of NIKKOR lenses until the 400mm f/2.8 TC VR came out. It’s the perfect sweet-spot lens for me, and if I engage the built-in 1.4x teleconverter, it’s an effective 560mm lens that gives me extra reach to photograph birds in the trees behind the feeder.
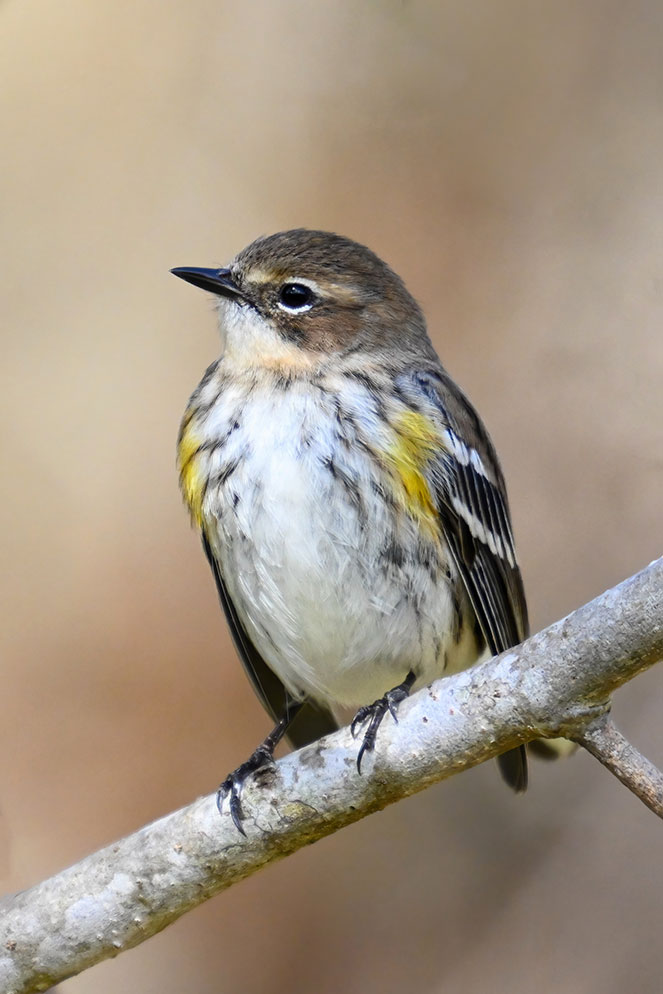
This yellow-rumped warbler, like the black and white one, was in a tree at the edge of the woods. I get a lot of these opportunities as birds enticed to the yard will at first keep their distance. The effective focal length here was 1120mm because I switched on the 400’s built-in 1.4x teleconverter, then put a 2X teleconverter on the lens. The woods definitely needed extra reach, and I’d set up that combo to do some exploring of that territory. Z 9, NIKKOR Z 400mm f/2.8 TC VR S and NIKKOR Z TC 2X, 1/1000 second, f/8, ISO 2500, aperture-priority exposure.
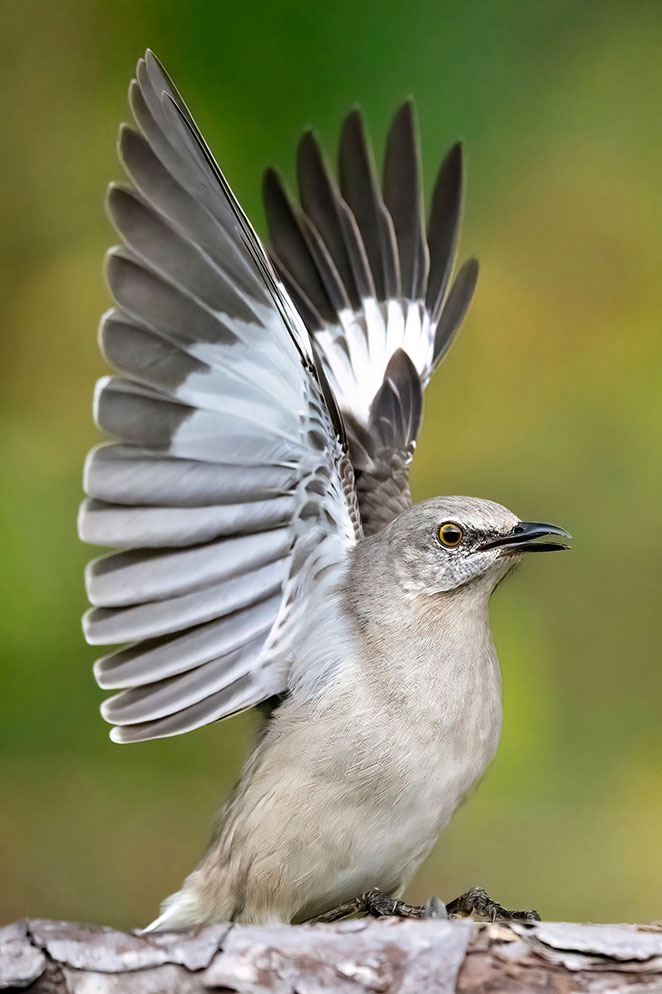
This mockingbird was perched on the bark strip on the front of the feeder, which highlights why it’s important for me to keep the bark fresh and clean. The camera’s angle deliberately avoids looking down into the feeder, which makes the scene look totally natural. Z 9, Mount Adapter FTZ II, AF-S NIKKOR 500mm f/5.6E PF ED VR, 1/2500 second, ISO 7200, aperture-priority exposure.
I do my viewing and photographing shortly after setting out the birds’ breakfast treats, as well as anytime of the day when I hear the chirps that signal activity. At one point I bought an HDMI video capture card. I’d connect it from the camera to the computer, QuickTime would pop up and I’d have a live look at the feeding area. It was fun to see, but then along came a firmware upgrade to the Z 9 that added the Auto Capture feature to the camera, and everything became a lot more exciting.
Briefly, Auto Capture allows me to set the camera so that it will automatically start shooting when it detects motion within the frame.
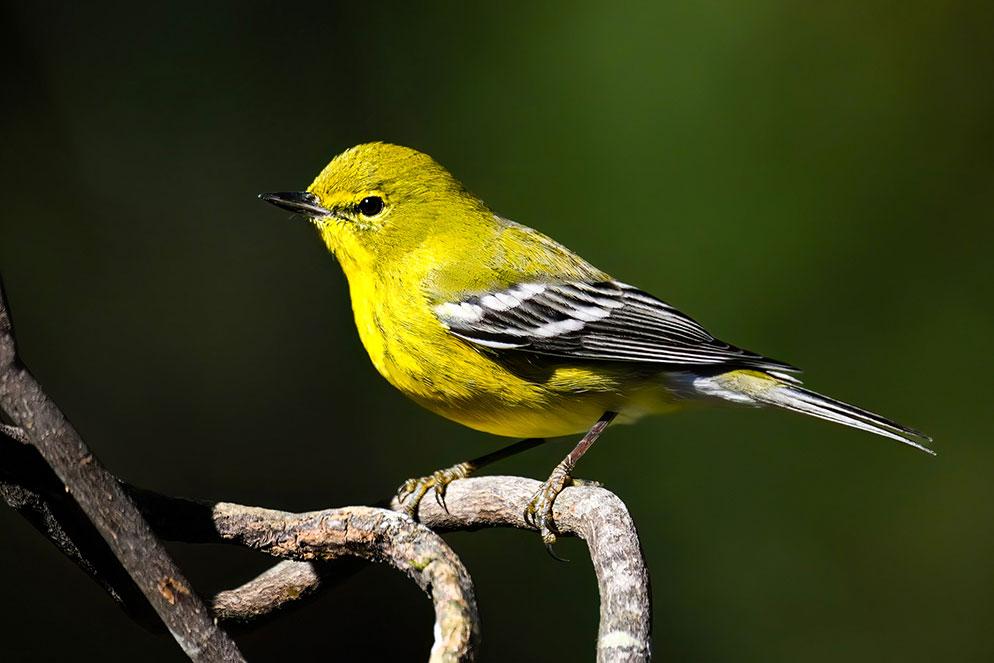
The complex geometry of the branch is no casual choice—I’m out to add interest for the birds; this one’s a pine warbler. Z 9, Mount Adapter FTZ II, AF-S NIKKOR 500mm f/5.6E PF ED VR, 1/10,000 second, ISO 2000, aperture-priority exposure.
Auto Capture not only enhances the photography experience for me, it also reacts a lot faster to movement than I can.
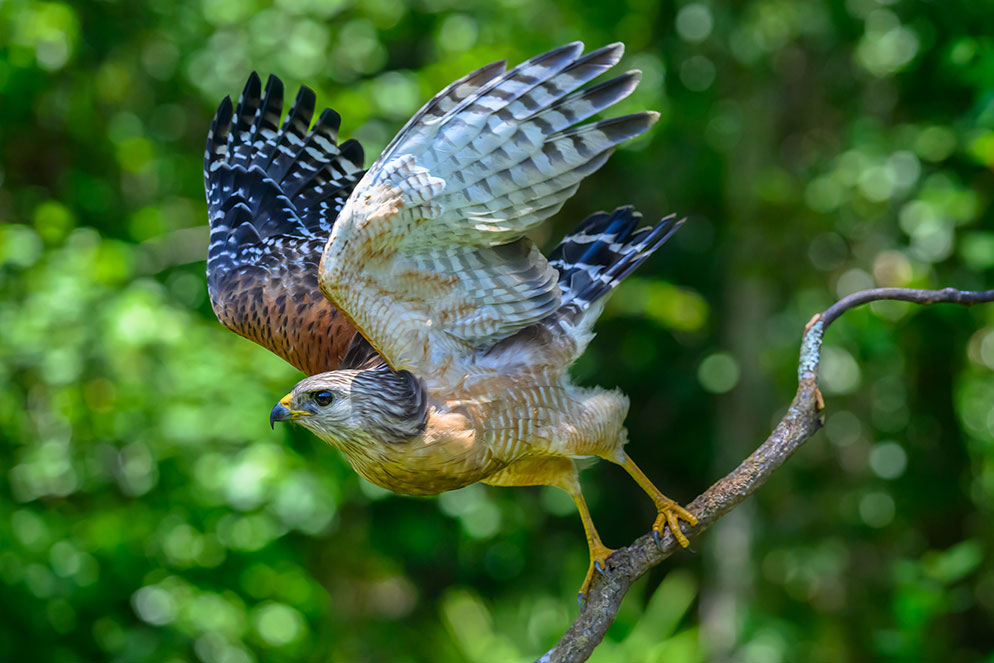
One day it suddenly got really quiet in the yard. I looked out the window to see what was up, and there, on the branch, where usually small birds perch, was a massive red-shouldered hawk, 18 feet away from me. He was too large and too close for the 400mm, so I quickly put the 100-400mm zoom on the camera. I got some shots at 175mm, but what I was really after was the moment before takeoff. He didn’t select anything from the feeder—I think he was just curious about why the little birds were landing on it. I know he saw me, but thankfully he was curious enough to stick around long enough for me to be ready to get the shot I most wanted. Z 9, NIKKOR Z 100-400mm f/4.5-5.6 VR S, 1/3200 second, f/5.6, ISO 4000, manual exposure.
First I set my basics for the backyard birds—f/stop, shutter speed, ISO, Eye AF and 20 frames per second—then, in the Auto Capture menu, I choose motion and small size of subject.
The result is that anytime there’s motion at the feeder the Z 9 detects it, locks onto the bird’s eye and takes pictures. I can be working at the computer, and if I hear the shutter start to click—I keep the sound on, but at a low setting—I can scoot the chair over and check out what’s happening. If it’s interesting, I take over the picture-taking. Auto Capture and the shutter sound alert me that something’s happening out there, something I might want to fine-tune my composition for. Auto Capture not only enhances the photography experience for me, it also reacts a lot faster to movement than I can.
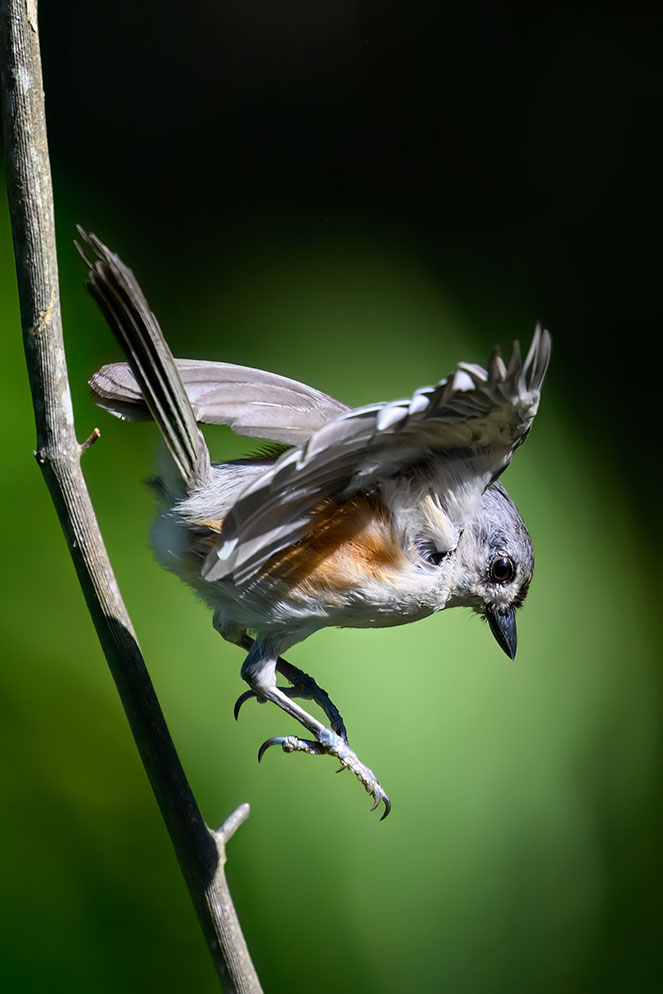
This tufted titmouse’s descent from the diagonally-placed branch down to the feeder is a cool shot I always like to get, and it was the result of Auto Capture being on the job at a time I wasn’t around. Z 9, NIKKOR Z 400mm f/2.8 TC VR S, 1/8000 second, f/5.6, ISO 3200, aperture-priority exposure.
Most of the time the window is open, unless it’s so hot that it’s not a good idea, and then I’ll shoot through the glass—but only during morning hours when there’s no glare to worry about. I just have to be sure the glass is clean and there’s no rain.
In effect, what I’ve done is set the stage—with bird food, with a twig or branch for my subjects to perch on, with my camera keeping watch, waiting for something to happen, always ready to tell me there’s activity.
As I’m sure you realize, I’m a big fan of birds. I love observing and photographing them. I’m happy to be able to provide a safe, inviting place for them. And I love that they provide the opportunity for me to create colorful and exciting images, all from the comfort of home.
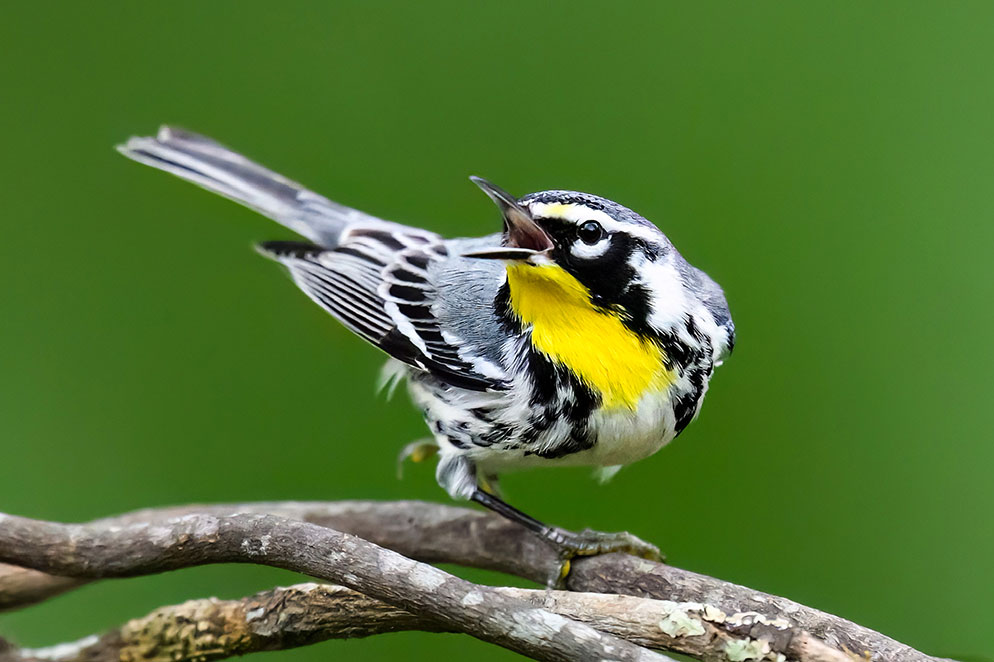
A yellow-throated warbler, all too happy to reveal the source of its name, perches on yet another version of the very interesting branch. I learned early on that changing the branches attracts the birds, so I regularly go to the woods to collect branches that help make pictures happen. Z 9, NIKKOR Z 400mm f/2.8 TC VR S, 1/5000 second, f/2.8, ISO 5000, aperture-priority exposure.
Tips, Specs, Suggestions
If you’re inspired to set up your own indoor bird blind, here’s some information you might find helpful.-
My f/stops are generally mid-range, f/4 to f/8, with f/5.6 my frequent starting point. That can vary for you depending on your distance from the front of your lens to the feeder and how far away your background—woods, fence, neighbor’s garden if you’re lucky. To me the feeder is the prime staging area, and to account for the distance and angle of the landing sticks and branches that I change all the time, I swivel the camera as needed.
-
I do all my composing, framing and viewing through the LCD—it’s a bigger, brighter, better view, and a habit I brought with me from my photography of seascapes.
-
The feeder sits on top of a 4x4 post that’s 8.5 feet high. (Yes, I keep a small ladder nearby so I can handle each day’s feeding.)
-
The green squirrel baffle is designed for a 4x4 post. It’s about eight inches tall and 22 inches in diameter. I got mine online. The raccoon baffle, also designed for a 4x4, is 24 inches long. I got it at a local outdoor-bird-lovers’ shop.
-
You don’t want to be shooting into the sun. I shoot toward the northwest and get beautiful morning light.
-
Don’t want to open a window? A soft-rubber lens hood pressed up against the glass will likely work well.
-
Don’t underestimate the importance of knowing what kind of food local and migrating birds like. Some prefer very tiny millet seeds; others are into peanuts. I think of it as kind of my job to provide the right enticements so the word gets around that the good stuff is at my place.
-
The relatively small amount of food put out every day is deliberate—the birds find most of their food in the woods. I was careful to consider right from the start that I was providing at least an opportunity, at best a treat, but not creating a dependency.

